How to replace LCD - DM3200/4800 Video

For some reason, I knew the failings of the LCD display for the DM-3200 & DM4800 but I don't remember if I gained that knowledge from this forum or some other web-site. But what Stephen says in the following is what convinced me a while ago to not even consider replacing the failing LCD display with another new one.

Cut/paste statement from Stephen (the Ebay seller of the LED display:

"Hi, thanx. Ive read the forum, whats being said there. if your back there chatting again, pls add this important information. this is something that users of the mixer, dont seem to be aware of.

The malfunctioning associated with the old display is due to the heat build up of the the ccfl backlight. (its basically a light bulb strapped to the side of the display) The only way to solve that problem, is to switch to LED. People reference a replacement display, thats cheaper, but what they dont realise is. That display is also a ccfl, and it will fail in the exact same way. Usually within 1-2 years. That means, basically, back to Square one.
Broken display again.

The only way to break this cycle and properly repair / upgrade the mixer is to go LED.

The problem is simple. People who own the mixers, dont understand what is causing the display malfunctioning. Once thats explained to them. They realise buying another ccfl display is crazy.

You made the correct decision.
You now have a display that will last 15-20+ years
Rgds Stephen"
 
I'm replacing the screen in my DM-3200 and, like you, I got to that same spot that wasn't covered in the video. The console is open, my screen is removed but I don't know how to remove the 2 connectors and I've fussed with them but I'm concerned about damaging the connectors or the wiring. Any thoughts or suggestions on how to proceed and finish the job?

Thanks!

OK. Due to some incompetence on my part the install of the LED display took way longer than needed. No soldering in the end. Just need to follow the seller's instructions explicitly. He was very helpful and patient. I now believe I'm a semi-expert in the change-out because I spent so much time on it......trying to figure out my mistakes and so forth. I will say that the video first posted under this chain for the DM-3200 stops at what I think is the most critical part of the install and if it would have continued to the actual install itself it would have answered a lot of my questions and I would have avoided my screw-ups. BUT... all is good. The display looks great and it's such a wonderful feeling to be able to read the display like I could years ago. I love this board and can't see using anything else unless the money fairy drops a ridiculous amount of cash in my lap. I think this option is far and away better than the 2seemy because you don't have to make space for another monitor which in my case I have none. This is like having a brand new board. I'm giddy!!!
 
Well. It might be terminology or it might be of poor memory since I did this change-over just a couple of weeks ago (or less)...or it might be because the DM-3200/DM-4800 are different. I don't know. I only remember "one" connector. When I said "semi-expert" that is a confession that I'm not a full expert on the change-over. Saying that... and trying to remember exactly how I did this...I remember from a previous post that there was some difficulty removing the connector that was attached to the LCD display from the panel on the mixer. It is difficult. I had to mess with it a good ten minutes before it came apart. It does come apart. I think there are tabs (or a tab) on the connector part that has to be depressed or pulled to allow the connector to become detached between the LCD display board and the mixer panel.

Just to clarify...and IF I'm on the same page as you.....have you attached the LCD display board to the panel on the mixer? This the first place I got faked out. Hole patterns don't match on one end, but that's ok. If you have questions at this point let me know. Also, remember that you have to fully remove the white plastic receiver from around the two pins that you see on the mixer panel. They're within an inch or so above the path of the ribbon cable right next to the strap supporting that cable. This was an extremely scary action for me because that plastic does not come out easily. In fact I tore pieces off that plastic in the process... I went into that a bit on an earlier post on this thread. Anyway, got some needle-nosed angled pliers and took my time and with firmness and patience I finally was able to fully remove that plastic. The connector from the LCD board fit perfectly after that.


I hope that this was helpful. Not sure I helped but hope so. I don't want to go too far here in case you've already figured out the other steps.
 
  • Like
Reactions: The Song Mill
When you say "connector" are you talking about the ribbons or the pin connector for contrast?
 
Thanks for the additional information. I was able to get it figured out. Taking the console apart is not a problem... keeping track of all the different screws (and they were ALL different) was a bit daunting so a word to the wise, notate which screws go where -- maybe take a picture of each batch of screws next to what it relates to.

Once inside, getting the screen removed was not a problem. The issue for me was the connector on the extra circuit board that screws to the back of the LCD. For that one, I used a small pair of pliers because fingers weren't gripping adequately. I then giggled it gently, back and forth and it came right out of the socket.

The other ribbon cable was perplexing but I found someone mention that it just slides right out. For that one I grabbed the ribbon cable with my fingers and was able to get it to slide out and then back into the new one on the LCD.

Mounted the new screen, reattached the circuit board to the back, reassembled the mixer and Viola'!

Had I not been stumped by the two connections, I could have had it all done in about 40 minutes.

Thanks to all for chiming in! I shot a little video at the end but I have issues getting these off my phone... but if I can get it off, I'll post it and it should complete the one video that is out there showing how to take the mixer apart.

Well. It might be terminology or it might be of poor memory since I did this change-over just a couple of weeks ago (or less)...or it might be because the DM-3200/DM-4800 are different. I don't know. I only remember "one" connector. When I said "semi-expert" that is a confession that I'm not a full expert on the change-over. Saying that... and trying to remember exactly how I did this...I remember from a previous post that there was some difficulty removing the connector that was attached to the LCD display from the panel on the mixer. It is difficult. I had to mess with it a good ten minutes before it came apart. It does come apart. I think there are tabs (or a tab) on the connector part that has to be depressed or pulled to allow the connector to become detached between the LCD display board and the mixer panel.

Just to clarify...and IF I'm on the same page as you.....have you attached the LCD display board to the panel on the mixer? This the first place I got faked out. Hole patterns don't match on one end, but that's ok. If you have questions at this point let me know. Also, remember that you have to fully remove the white plastic receiver from around the two pins that you see on the mixer panel. They're within an inch or so above the path of the ribbon cable right next to the strap supporting that cable. This was an extremely scary action for me because that plastic does not come out easily. In fact I tore pieces off that plastic in the process... I went into that a bit on an earlier post on this thread. Anyway, got some needle-nosed angled pliers and took my time and with firmness and patience I finally was able to fully remove that plastic. The connector from the LCD board fit perfectly after that.


I hope that this was helpful. Not sure I helped but hope so. I don't want to go too far here in case you've already figured out the other steps.
 
cmaffia,

The connector I was referring to is the cable that supplies power to the display from the board. If I knew how to post pics on this forum I would have supplied a couple to indicate exactly what I meant. BTW, I fully agree with Song Mill about the change-over time. If I had known a couple of the details beforehand I could have had the display changed out in about 40 min. I hope others that will end up changing the displays will access this thread and gain some knowledge. ...
 
I have a DM-4800 and have followed the video but when i try to open the console (lift the hood) the left side of the part that opens seems to be attached or screwed somewhere else and i can't see where it would be. Anyone else have that issue with the 4800?
 
yeah that's an undoc'd issue with DM4800's v 3200's. What you need to do is unscrew the CF card holder on the face of the console. The 2 shiny screws holding the reader to the face. When you do this the reader will free it's tether from below to the desktop and you can then lift the top as per the guides. When you go to reassemble just feed the CF reader up thru the slot from below and loosely screw it in at first and tighten when all is good. I love the display I got from the guy in England, dunno if that's the one you're installing but either way it's nice to not have the nasty lines. I just like the LED version and think it's worth the extra $ since it will probly go a long time in service. Heck I even have a 3200 as backup and I didn't want to steal the display from that since I knew it would also die in a few years. Eventually I will have to raid that unit for spare parts but a lot of what I've had die on the 4800 is not the same on the 3200. Mainly I had the analog monitor section die on the 4800 so I just go digital out to a Benchmark converter to a Mackie Big Knob and that's a great hack that's better than the 4800. Good luck you can do this!!
 
Thank you very much! Got it done and back in business. I actually got mine a few years ago from Tascam as soon as I saw a hint of a line. I just rode it out until the screen got to be unreadable. Wish I knew about the LED version at the time but hopefully this'll last a good while. Thanks again and be safe.
 
Hi, Im a new guy here and I know this is an old post.. Does anyone know the part number of the LED Display or where I can buy it. I have been a Tech for 40+ years sure I can figure out the rest and maybe make this clear for others.
 
  • Like
Reactions: -mjk-
  • Like
Reactions: Peter Batah
I did this a few years ago and had the bright idea to install a switch to turn off the back light when I did not need it... that proved to be useless. My DM4800 needs the display replaced yet again. Same issue... lines. I wonder if Tascam still stocks them?
 
Bruce, don't waste your time trying to find an LCD replacement, just pick up the LED version from Luxdisplays and be done with it. I replaced mine almost eighteen months ago, as have many others in this forum, and it is a brilliant change from the old tech. I don't know why there are so many people trying to reinvent the wheel when such an easy, long lasting fix is so readily available. Lots of info on the LED alternative in this forum, so no need to get into the details, just source it out and you will find everything you need.

Jack
 
  • Like
Reactions: Black Shadow
Hello folks, greetings from Brazil!
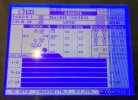
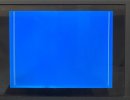
This week I installed the SNAFU LED display bought at the reverb.com store, I have 2seemy installed, when I turned on the TASCAM the new LED display, it showed these vertical lines on the right side, what could have gone wrong? The old display was completely useless, as shown in the second picture. Thank you.
 

Attachments

  • IMG_4157.jpg
    IMG_4157.jpg
    137.8 KB · Views: 6
  • IMG_4161.jpg
    IMG_4161.jpg
    41.8 KB · Views: 6
It is defective. Nothing more to do with it. I have a spare "After Market" bought from UK eBay seller left around. Mine is powered on all day long since 2019 and seems eternal... almost :). I announced it a few years ago but never reached the interested guys for unknown reasons.


P.S. I don't know the SNAFU, though
 
  • Like
Reactions: mixerizer
Hello folks, greetings from Brazil!
This week I installed the SNAFU LED display bought at the reverb.com store, I have 2seemy installed, when I turned on the TASCAM the new LED display, it showed these vertical lines on the right side, what could have gone wrong? The old display was completely useless, as shown in the second picture. Thank you.
Are you saying that you are using the 2Seemy drivers with an aftermarket replacement LED. I have to agree with JP. Defective display or bad cabling
 
  • Like
Reactions: mixerizer
Hey there, can you describe the missing steps? I did the install but I don’t think I ever watched the video. Thank you!

PS I answered this the same way these guys did just now, in one of the other posts on this same issue.
 
Last edited:
  • Like
Reactions: Peter Batah
Hello! well, first i disconnect all the cables on the old "dead" display, then installed the new display that supposed to be a "led" display, then connected the flat cable coming from the mixer's main board to the display and the two cables red and white soldered on the new display to the small connector in the mixer, i left the 2seemy internal board disconnected.
 
  • Like
Reactions: mixerizer

New posts

New threads

Members online